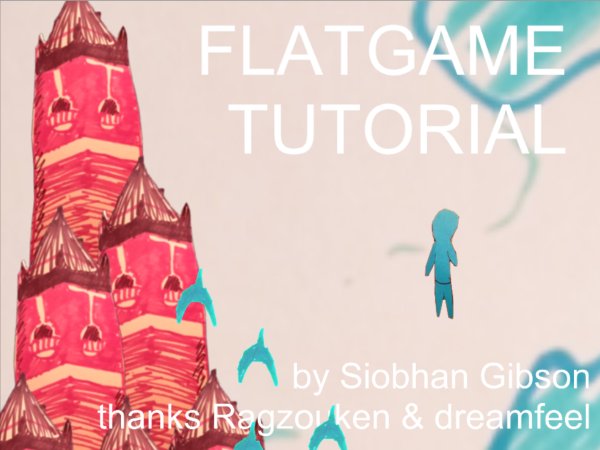
The First-Timers' Guide to Making a Flatgame!
A downloadable project

What’s a flatgame?
Flatgames are focused on presenting a game as the most raw combination of movement, art and sound.
A flatgame is a 2D game with very simple controls; usually all the player can do is move around to explore a single scene. The point of a flatgame is for it to be as easy to make as possible; you can use your own hand-drawn art, and there’s no coding involved. The idea is to aim to spend between a couple of hours and half a day making the whole game.
Take a look at the submissions for the Flatgame Annuals 2016 and 2017 to get some inspiration!
Note: These instructions apply to the process of making a flatgame with Unity on your PC; you can also use an Android app called flatpack to make the same sort of game. If you get stuck while following this guide, you can email Llaura at dreamfeelx[at]gmail.com.
- Section 1: Getting ready
- Download and install Unity
- Download the flatgame scripts
- Create the art for your game
- Create the audio for your game
- Section 2: Making your game
- Start a new Unity project
- Import your assets into Unity
- Add images
- Make a player character
- Animate your characters, props, and backgrounds
- Animate your player character
- Add audio to your game
- Add text to your game
- Section 3: Releasing your game
- Build a playable game file
- Publish your game on itch.io
Section 1: Getting ready
This section explains how to get the artwork and assets ready to start making your flatgame. You need to have the following tools installed on your computer:
- Unity
- Image editing software (e.g. Photoshop, GIMP)
- Audio recording software (e.g. Windows Sound Recorder, Quicktime, Audacity)
Download and install Unity
Download the latest version of Unity and install it. During installation it gives you a list of components to install; make sure you tick the checkboxes for Windows, Linux and WebGL (Unity has macOS build support by default). This ensures your game can run on those platforms when it’s finished.
You don’t need to worry about opening Unity right now; let’s get everything else ready first.
Download the flatgame scripts
There are two basic scripts to make a flatgame: MoveSimply and AnimateSimply. Download basic scripts.
Note: There are some more advanced scripts that go beyond the original flatgame concept, but we’re not going to look at those in this tutorial. If you’re curious later, you can try them out: Download advanced scripts.
Create the art for your game
Flatgames focus on making your art physically, using whatever materials you want, including pen and paper, crayons, water paints, or photos of items around your house.
At the very least, you should create something visual for:
- The game’s backdrop or map
- The player character
...but you should also think about extra characters and props you want to feature in your game!
Place some limitations on yourself so that you don’t worry too much about making it perfect. For example, try to do all of your art within an hour, or draw everything on one A3 piece of paper and don’t cross anything out. If you want to animate your art so that changes pose, draw the new pose as well; if you just want to make it wobble, just draw the same thing a few times (we’ll learn how to animate it later).
Scan your drawings/paintings, or take photographs of them with your phone, and load your images into an image editor like Gimp or Photoshop. From here you can trim them down to the right size (there should be a Lasso tool to help you “cut out” drawings, if you want to), and add some filters and effects if you want to change the way they look. Save each drawing as a separate .png file.
Tip: The Lasso tool is a little fiddly, but there’s a faster, slightly more slap-dash way of doing things, if your image editing tool allows you to use different layers (GIMP and Photoshop both do this):
- Add a new layer to your image.
- On the new layer, paint over what you want in semi-transparent black with a thick brush.
- Use the image editor’s Magic Wand tool to select what you’ve painted.
- Select the layer with your original drawing on it. The selection lines should now sit around your drawing. Crop the image, and cut out everything except what’s inside the selection lines (this works differently for different image editors, so you might need to look up how to do this).
- Finally, delete the layer you painted onto, and export/save your image as a .png file.
For more tips on cutting out shapes, see Spoon Graphics’ Ultimate Guide to Cutting Stuff Out in Photoshop - it’s Photoshop-specific, but the advice applies to most good image-editing tools.
Create the audio for your game
The flatgame rules suggest no sound effects, just a single track of sound. It could be ambient music or background noise. There are many different ways you could create some background music for your game:
- If you already have instruments and recording equipment, you’re all set - just make something nice (or not-nice) and make an audio file.
- If you have instruments but no recording equipment, all you need is a microphone (your laptop or headset microphone is good enough!) and a piece of software that can record what you play into it (most operating systems have something built-in, but if not, Audacity is a good free tool for this).
- If you have no instruments, that’s okay! You could tap a rhythm on your desk, play discordant notes on glasses of water, hum softly in the bathroom, or you could grab some audio from a YouTube video.
The audio doesn’t have to be musical - it could be a recording of street ambience, the sound of your home’s central heating system, or even a recording of you and your friend playing it for the first time (like in Macaulay Dad 2016). There are all sorts of interesting sounds in your house!
Section 2: Making your game
Now you’ve got all the assets for your game (art, audio, and the pre-built scripts), it’s time to bring it all together. This section teaches you how to do the following:
- Start a new Unity project
- Import your assets into Unity
- Add images to your game
- Make a player character
- Animate your characters, props, and backgrounds
- Add audio to your game
Flatgame beginner template projectThis guide assumes that you’re starting from scratch; however, we’ve created a template project for you to work from, if you want to. You can use this template as a starting point for your own game, or just as an example to help you understand how to put a flatgame together from scratch. Download the beginner-level flatgame template (optional). To open the template project, download and unzip it. Next, open Unity, and in the launch screen that appears, click Open to open an existing project. Select the folder that contains all of the files you downloaded, and click Open. |
Start a Unity project
Open Unity. In the launch screen that appears, click New to start a new project. Give it a project name (you can change it later) and select the 2D checkbox. Click Create Project when you’re ready.
If you’ve never used Unity before it can look scary, but you only need its most basic functions for this. Take a look at the Unity Interface documentation for an idea of what you’re looking at, and don’t panic - we designed this guide to take you through all the steps you need to make a flatgame with no assumed knowledge.
Import your assets into Unity
When you create a new project, the only two GameObjects in your Scene are a Main Camera and a Light (the two items in the Hierarchy). That’s a good start, but you need all sorts of other things - your artwork, the pre-built scripts, and your audio. To add these to your project, drag and drop them from your file browser window to the Project window in Unity. You can also bring the whole folder in at once, if that’s easier. This puts them in your project’s Assets folder (right-click the Project window and click Show Folder (Windows) or Reveal in Finder (macOS) to see where this is on your computer). Pull in your images, the pre-built basic scripts, and your audio if you have it.
Add images
To add any art asset to your game, drag the image file from the Project window to the Scene view. This creates a GameObject with a Transform component and a Sprite Renderer component. You can also drag the file from the Project window to the Hierarchy window.
Move it and rotate it to wherever you like, and duplicate it as many times as you like with Ctrl+D (Windows) or Cmd+D (macOS). Repeat the process for each image, and add as many images as you want to create your game world!
|
Note: You might find that you need to resize things. If so, it’s often better to do this in an external image editor (like Photoshop) and then re-import the images, because doing it in Unity can sometimes decrease the image quality. To re-import images after you’ve edited and saved them, just right-click them in the Project window and click Reimport. |
You might want to annotate your game with text. If so, use your own handwriting, or photographs of words and letters, and treat it like any other image.
Make a player character
To create a player character, start by repeating the process in the Add images section above, with an image you want to use to represent your player. If you have more than one image, just use one of them for now - we’ll learn about animation later.
You need your player GameObject to do two things:
- Move when the player presses buttons on the keyboard or joystick
- Take the game’s camera with it when it moves
To make the player GameObject move when the player presses a button:
-
Add the pre-built script MoveSimply. To add a script to a GameObject, select the GameObject, then drag the script from the Project window onto the Inspector window. You can also add scripts with the Add Component button in the Inspector window.
Scripts work just like components in Unity. Here are the settings in the MoveSimply script:
|
Setting |
Function |
|
Relative Movement |
Enable this if you want the GameObject to move relative to the direction it’s facing. This is really only useful if you use a script that rotates the GameObject, which we’re not including in this tutorial, so ignore this setting for now. |
|
Movement Speed |
Increase or decrease the number to increase or decrease the speed the character moves. This is set to 1 by default. |
|
<direction> Key |
Choose which key the player should press to move the player character in each direction. |
|
Flip With Movement |
Enable these to flip the image when you move. This is useful if, for example, you want your player character to face the direction you’re moving. |
|
Turn With Movement |
Enable this to make the character rotate when you move. Think of the directions as positions on a clock: go left to face 3 o’clock, down to face 6 o’clock, right to face 9 o’clock, and up to face 12 o’clock. |
|
Rotate Time |
Set the amount of time it takes (in seconds) to turn 90 degrees, if you have enabled Turn With Movement. |
|
Reset When Still |
If you have enabled Turn With Movement, enable Reset When Still to reset the rotation to default whenever you stop moving. |
To make the player GameObject take the camera with it when it moves:
-
Make the Main Camera a child GameObject of the player GameObject. To do this, drag and drop the Main Camera GameObject onto the player GameObject.
Press the Play button at the top of the screen to test it!
Animate your characters, props, and backgrounds
To animate the art assets in your game, use the pre-built script AnimateSimply. This script allows you to assign multiple images that cycle on a single GameObject (like a looping flipbook!).
- You need to attach the script to a GameObject, so first let’s make a new, empty GameObject. Right-click inside the Hierarchy window and click Create Empty. This creates an invisible GameObject with nothing but a Transform component on it (this controls the location, angle and size of your GameObject).
- Add the AnimateSimply script to the new GameObject. To do this, select the GameObject, then drag and drop the AnimateSimply script from the Project window onto the Inspector window. You can also add it with the Add Component button in the Inspector window.
- Make one GameObject for each image you want to include in the animation. Like in the Add images section, drag and drop them from the Project window into the Hierarchy window or Scene view.
- In the Hierarchy window, select your image GameObjects, then drag and drop them onto the GameObject with the AnimateSimply script. This makes them child GameObjects of the AnimateSimply GameObject, and they become frames for the animation.
Here are the settings in the AnimateSimply component:
|
Setting |
Function |
|
Current Frame |
Unity updates this with the frame the Sprite Renderer is currently displaying. You don’t need to do anything with this setting. |
|
Animation Duration |
How many seconds it takes to loop through all the frames in the animation once (in seconds). Increase the number to make the animation slower; decrease it to make the animation faster. |
|
Each Frame Duration |
How many seconds it takes to display a single frame in the animation (in seconds). Increase the number to make the animation slower; decrease it to make the animation faster. |
|
Start on Random Time |
Enable this if you want the animation to start on a random frame. This is disabled by default. |
|
Rename Frames |
Enable this if you want Unity to automatically rename GameObjects that become animation frames. Unity renames them to Frame <number>. This is enabled by default. |
Animating your player character
If you’re animating your player character, you need to structure things a little differently to what we’ve done so far. Here’s the best way to lay out the GameObjects in the Hierarchy window, with the attached components in square brackets:
-
Player [MoveSimply]
- Main Camera [Camera]
- Player Animation [AnimateSimply]
- frame 1 [Sprite Renderer with an image in the Sprite field]
- frame 2 [Sprite Renderer with a different image in the Sprite field]
Note that you can use as many frames as you want.
Add audio to your game
Just like image assets, you need to attach your audio file to a GameObject to put it in your game. However, you don’t need to make a new GameObject; you can just attach it to the player-controlled character. To add your audio file to your game, follow these steps:
- Click the GameObject for the player-controlled character, and in the Inspector window, click Add Component.
- Search for and select Audio Source.
- In the Audio Source component, the first property is AudioClip, and by default it has a field that says None (AudioClip). To replace this with an audio file, click the little target symbol next to that field and select the file, or drag the file from the Project window onto the field.
- Enable Play On Awake to make sure the audio plays as soon as the game starts.
- Enable Loop if you want the audio file to start playing again once it’s finished.
- Finally, add a component called Audio Listener to your Main Camera GameObject. This “hears” the audio from the Audio Source, so that you can hear it in the game.
Section 3: Releasing your game
This is exciting! All that’s left to do is turn your game into a file that people can open and play, and then put it somewhere for people to access it.
Basically, “building” your game means collecting up all the files in your project folder, and putting them all together to create a single playable file. Thankfully, Unity does this for you - just follow these steps when you’re ready to release your game:
- In Unity, go to File > Build Settings.
- Click Add Open Scenes to add the Scene you’ve been working on.
- Make sure the platform selected is PC, Mac & Linux Standalone.
- Different operating systems run different files, so you need to do a separate build for each platform you want to be able to run your game on. Select Target Platform, choose a platform, then click Build. Unity saves these files to your project folder; put each one into a different .zip file.
|
Platforms you might want to build for:
|
Finally, put your game online:
- If you haven’t already, sign up to https://itch.io, and log into your account.
- From any page, click the arrow in the top-right corner and select Upload new project.
- Fill out all of the information about your game - give it a name, URL, tagline, description, screenshot, genre, and some tags.
- Select Upload files and upload the zip file of your build.
- Select the platform that your uploaded file runs on.
- If you have different builds for different platforms, select Upload files again and repeat until you have uploaded all of them.
- When you’re done, scroll to the bottom and click Save & view page to view a draft preview of the page. Click DRAFT to go back to the edit screen, and make changes if you need to.
- When you’re happy, set the Visibility & access to Public, and click Save.
Congratulations! You just released a flatgame!
If you made the game for a gamejam, you can now submit your game to the jam’s itch.io page:
- Go to the jam submission page and click Submit your project.
- Select the game you just uploaded, and give any info requested.
- Click Submit.
That’s it, you’re done!
If you used this guide, we would really love to see what you made - you can tweet Llaura at @dreamfeelx, and Siobhan at @siobhangx. If you have feedback on this guide (good or bad!), drop an email to Siobhan at siobhang64[at]gmail.com, and Llaura at dreamfeelx[at]gmail.com. Thank you!